Build Mode Interface
Object Customization
Building & Terrain Tools
Tips for Tackling All Those Options
Using Community Builds
GETTING INTO BUILD MODE
Build Mode is available on the active lots you own. I say lots because your Parafolk household can own more than one home at a time. You can enter Build Mode by clicking the house icon in the bottom left corner while on your lot or by pressing TAB to toggle between Live Mode and Build Mode.
Once you're in, most of what you need is organized into five main areas: Structures, Rooms, Furniture, Terrain Tools and Search.

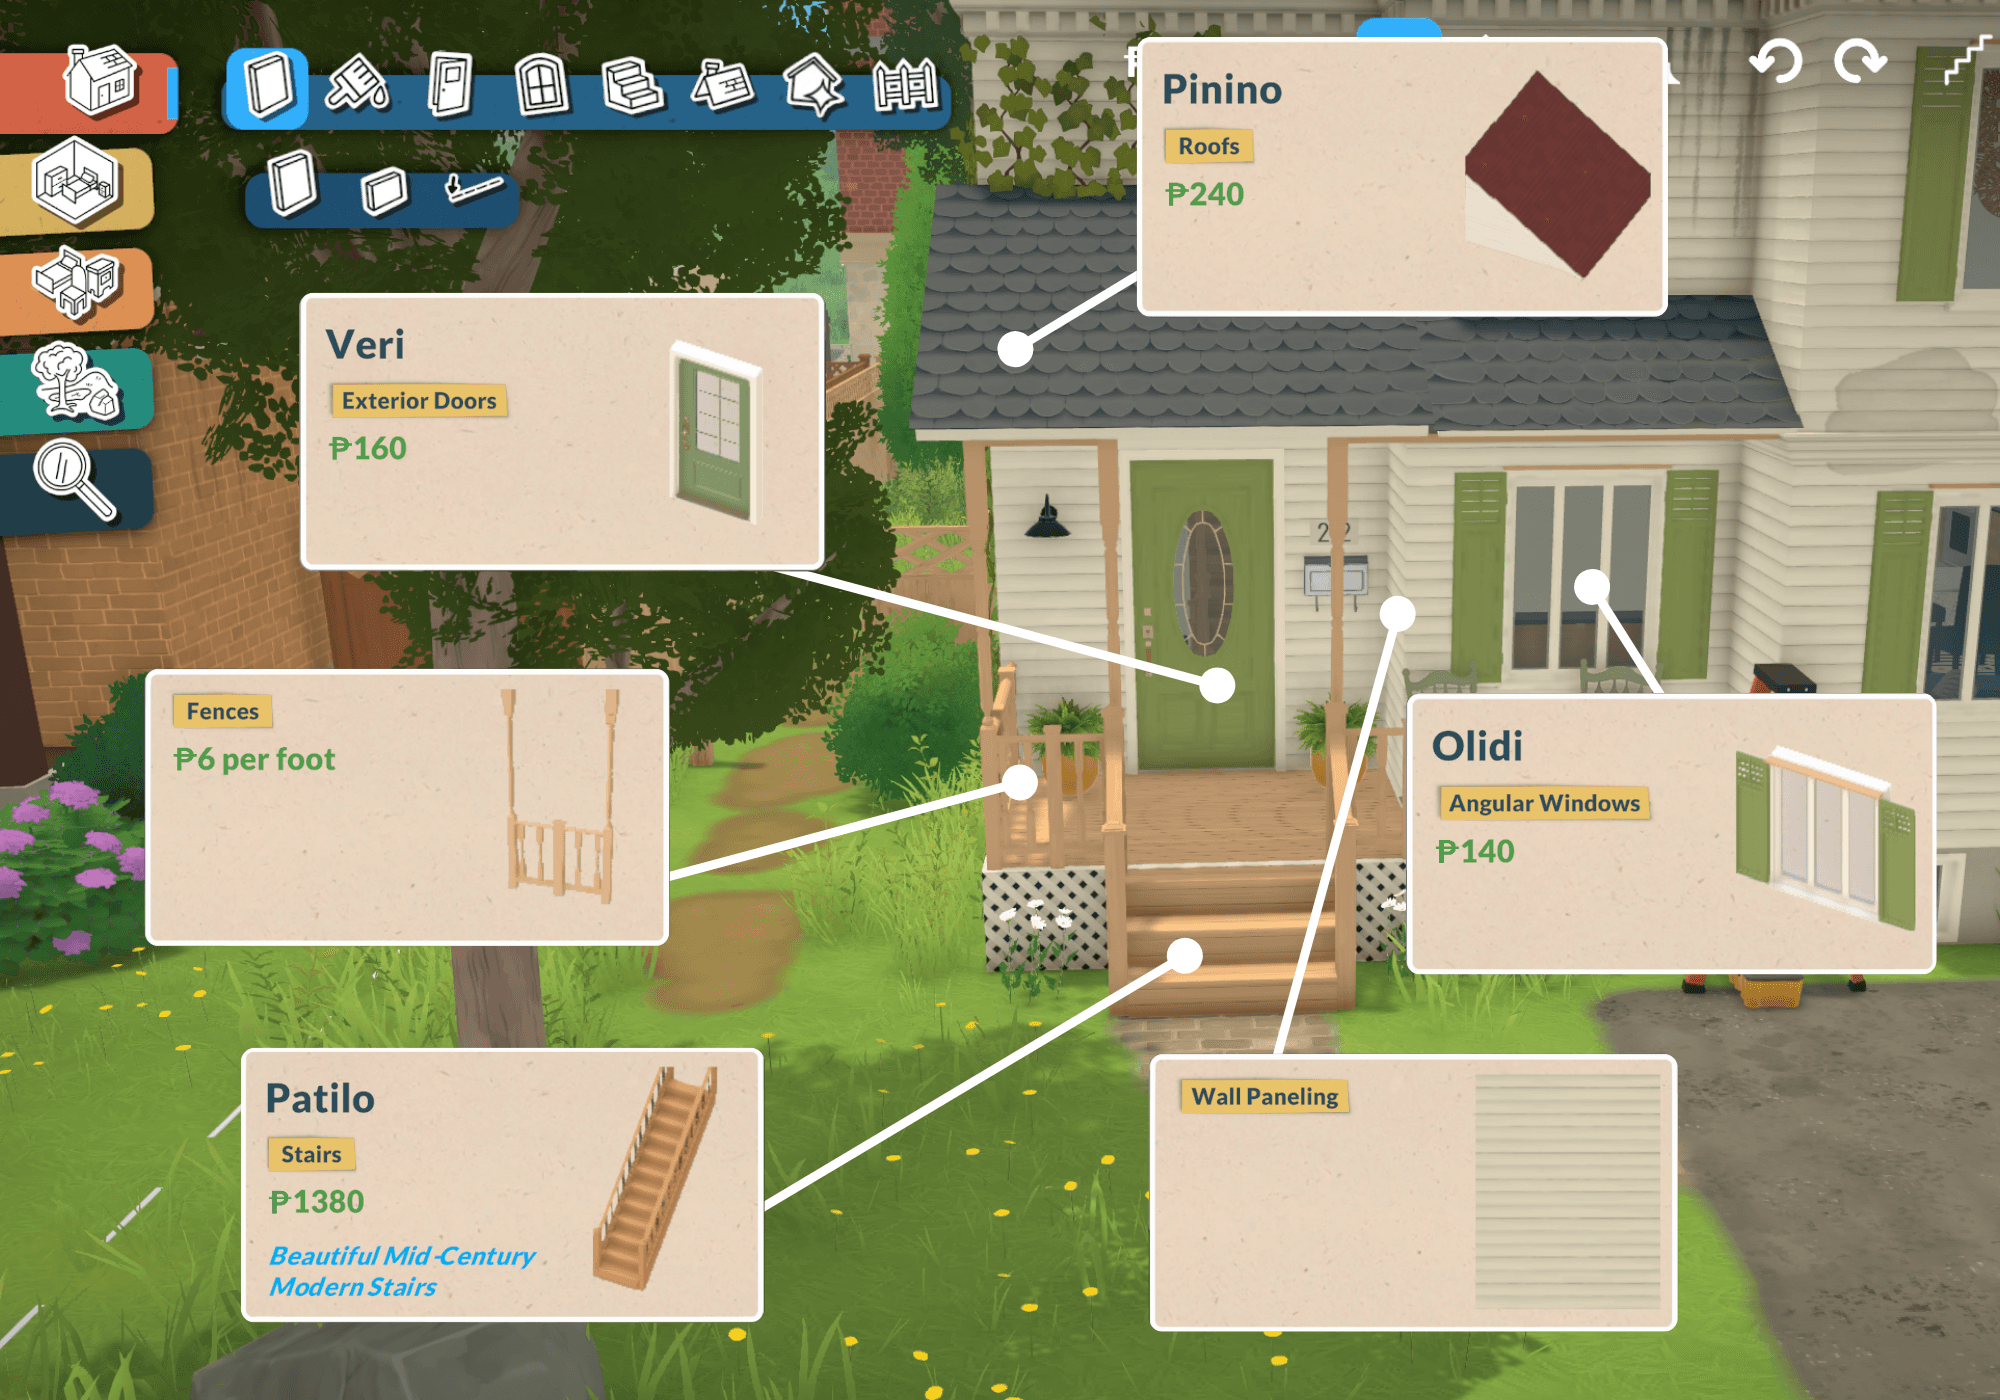
Structures
This is where you'll find the architectural pieces that make up the bones of your build.
Walls, half walls, wall coverings, flooring, ceilings, roofs, doors, windows, stairs, fences, fireplaces and other architectural details live here.
If you're actually building a house from the ground up, you'll spend plenty of time in this tab.

Rooms
Rooms organizes the catalog based on where you're most likely to use an object.
Living Room, Kitchen, Dining Room, Bathroom, Bedroom and other room categories make it easy to shop for one space at a time.
You'll see some overlap, especially with things like lighting and decor that can work in several rooms. But no, there won't be stoves under the toilets tab.
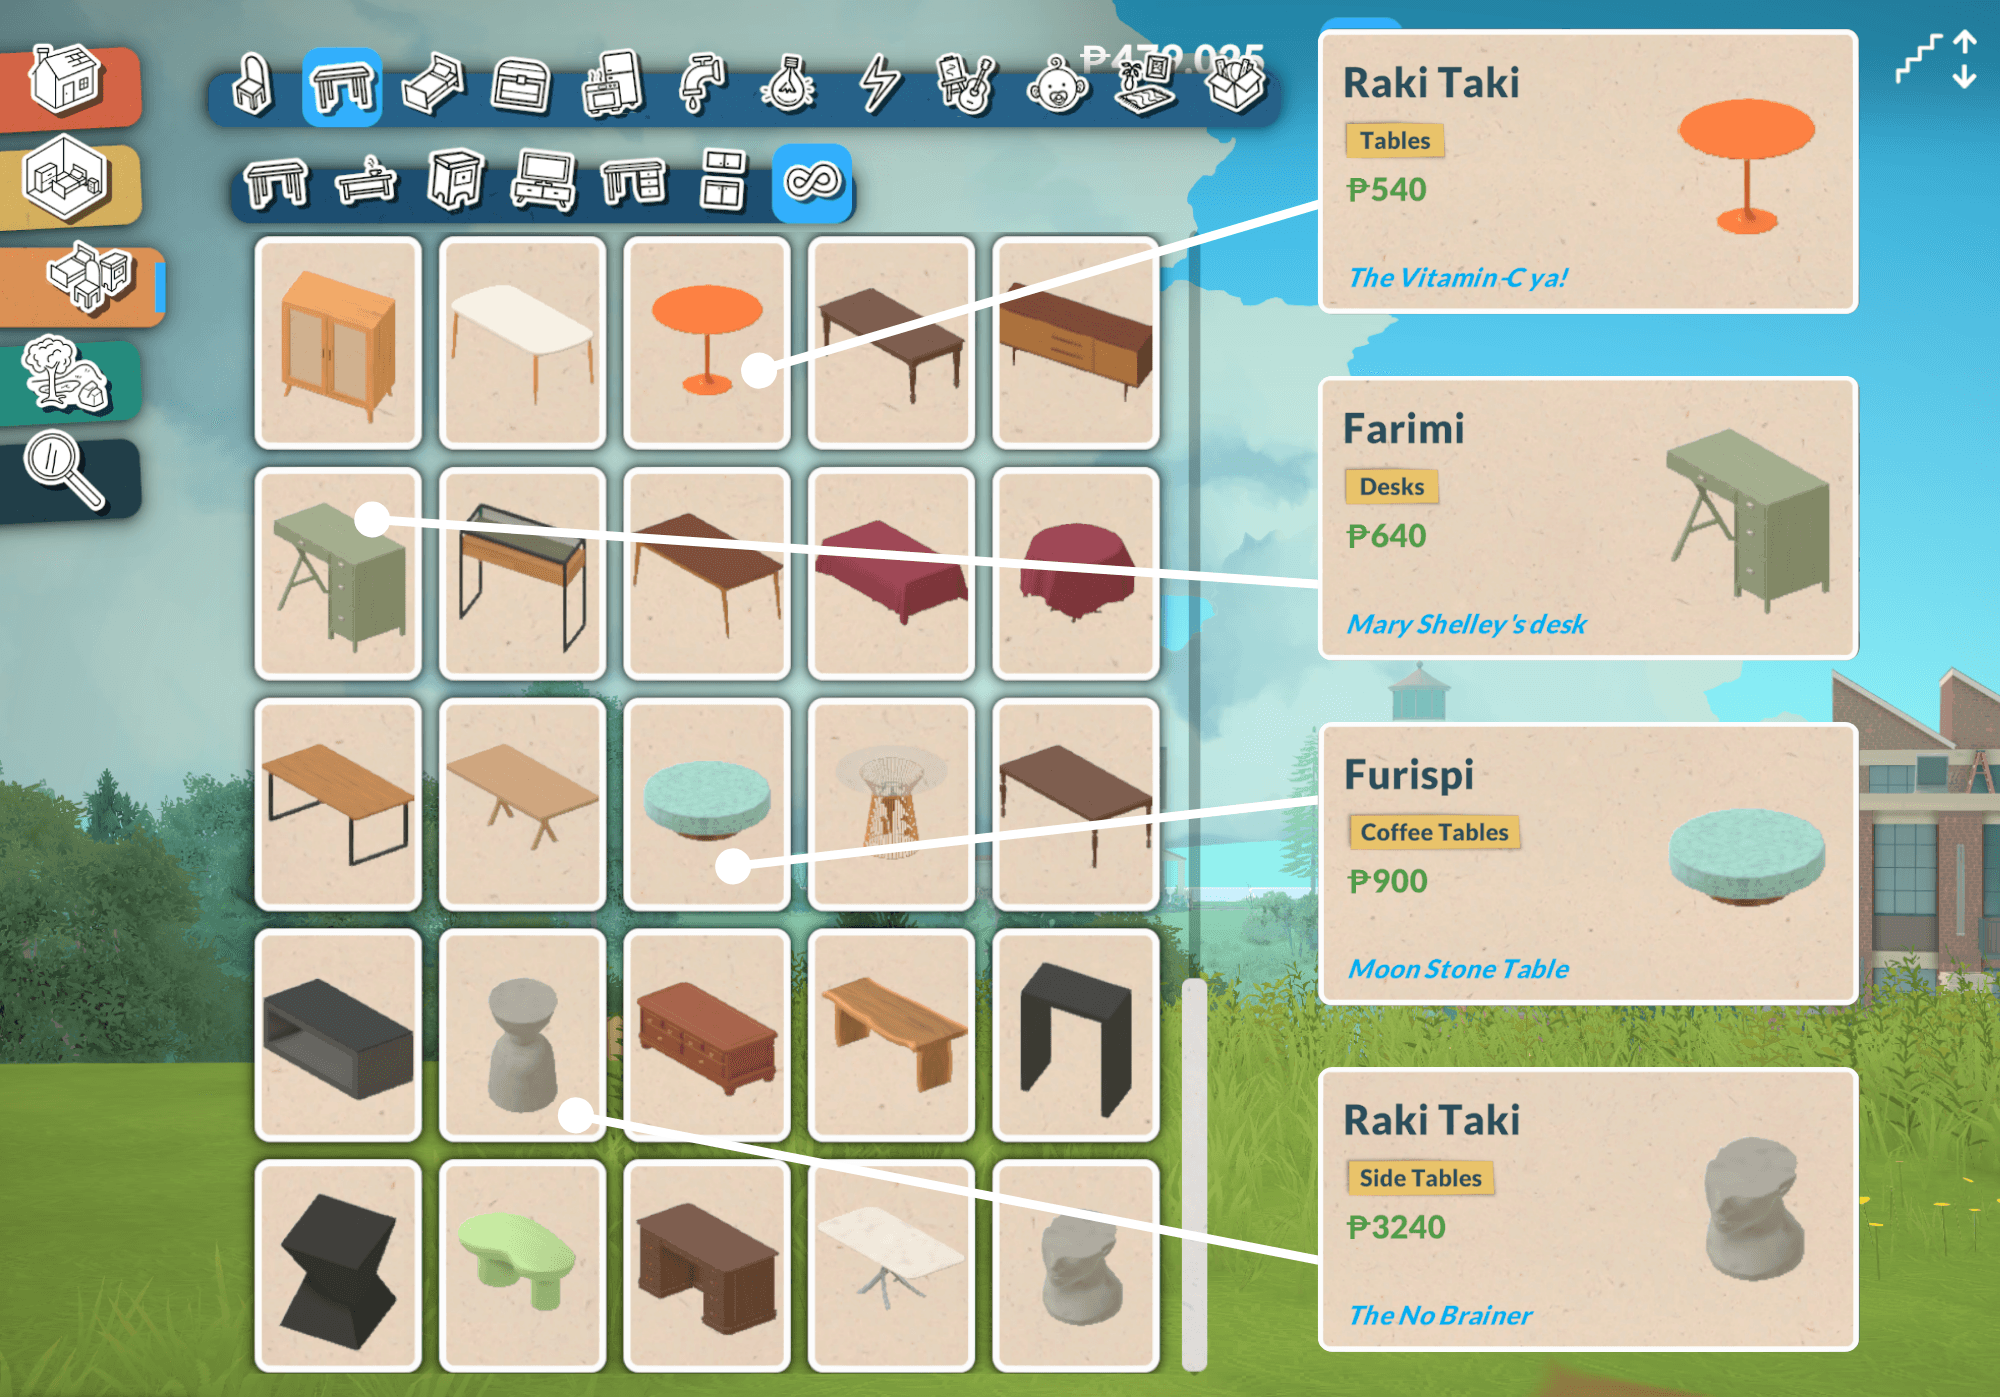
Furniture
Furniture gives you another way to browse many of those same objects, except this time they're organized by what they are instead of where they go.
For example, selecting the chair category will show all chair categories unspecific to a particular room.
Neither way is better, you'll probably find yourself bouncing between both depending on what you're looking for.

Terrain Tools
This is everything you need to tackle the actual land around your build.
Here you'll find nature objects along with tools for sculpting and painting the terrain. You can raise, lower, smooth and flatten areas of your lot before adding the landscaping on top.
Use Search Feature
When you know what you are looking for and have absolutely no idea which category it lives under: Search for it. I have used this many time as I have gotten more comfortable with Build Mode. Anything from chairs, curtains, mirrors, plates, books, etc. If you can't find it, search for it!
You can also jump directly to the catalog search with Ctrl + F on Windows or Cmd + F on Mac.

CUSTOMIZE... PRETTY MUCH EVERYTHING
This is where Build Mode starts to feel very Paralives. The objects in the catalog give you a starting point, but many of them have additional options for color, material, size and even individual details. Don't assume the version you see in the catalog is the version you're stuck with.
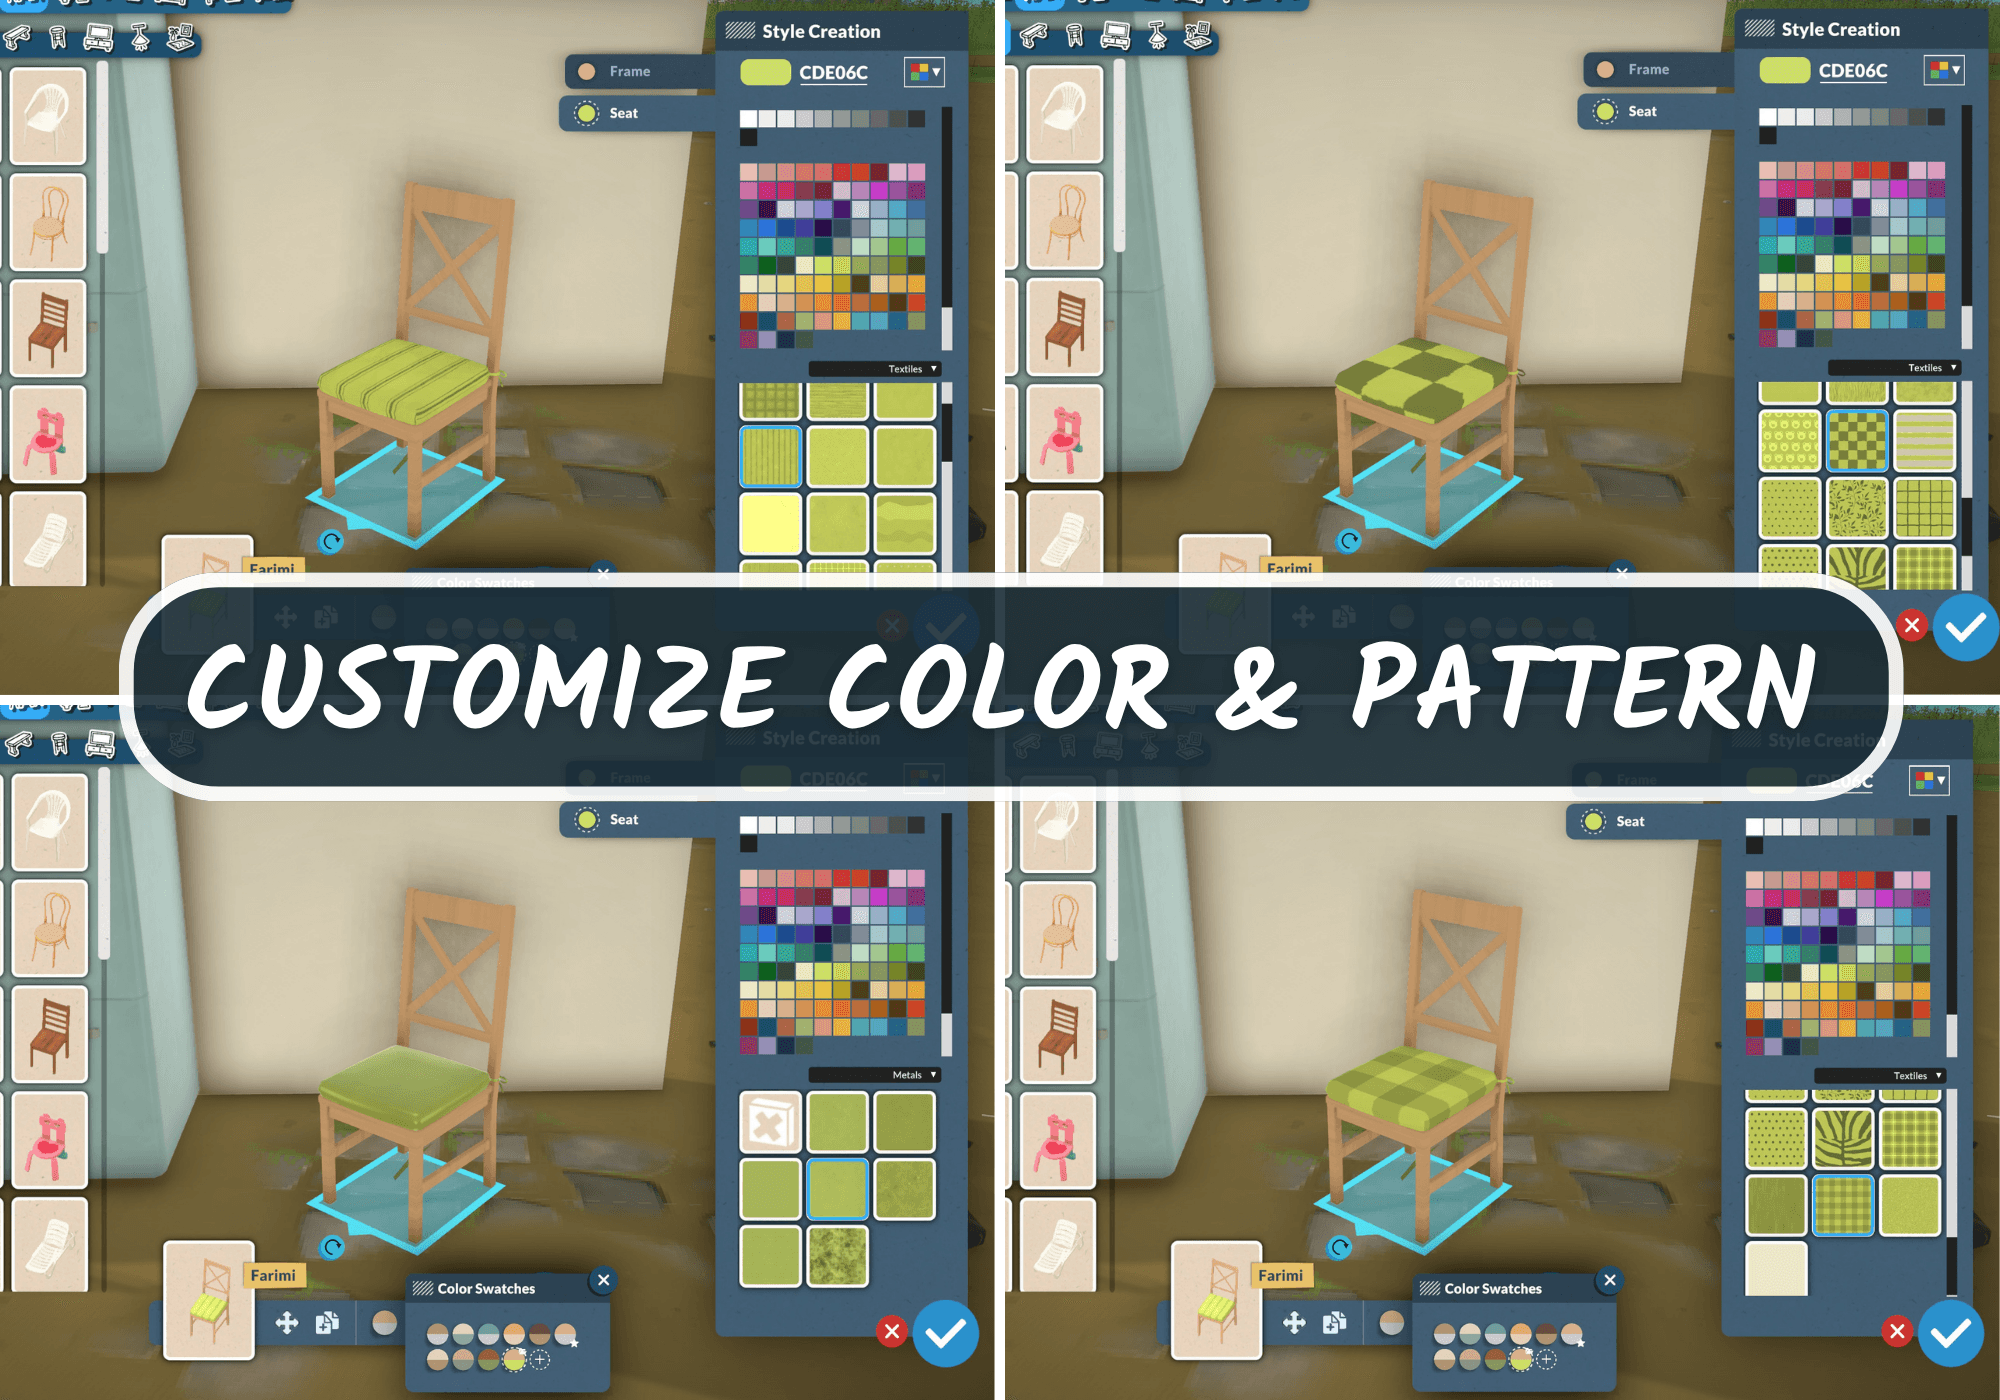
Color & Material
Objects come with predetermined swatches, but you can click the + in the swatch options to open the color wheel.
From there, you can choose your own color or enter a specific color code when you're trying to match something exactly.
Depending on the object, you'll also be able to customize individual parts, textures or materials.
The same customization extends beyond furniture. Walls, floors and ceilings can also be recolored, giving you a lot more freedom than the original swatches might suggest.

Size
See those double arrows? Start clicking them.
Many objects in Build Mode can be resized, including beds, mirrors, tables, seating, counters, clutter and more.
This isn't just a fun little feature either. Resizing can completely change the proportions of a room or make an object work in a space where the default version didn't quite fit.
Not every object can be resized, so look for the resizing option when you have something selected.

Flip It
Some objects have directional options that are very easy to overlook.
You can flip details like the handles on kitchen counters and, yes, even change which way the toilet paper hangs.
Is that necessary? Maybe not.
Do I appreciate that the option exists? Absolutely.

Variants
If you see ••• while customizing an object, don't ignore them.
Some objects have additional style or configuration options tucked behind them. When something feels like it should have another variation, check here before giving up on it.
YOU DON'T HAVE TO BUILD ON A GRID
One of the biggest differences you'll notice when building in Paralives is how little the game forces you into a traditional grid.
Walls, half walls and fences can be placed freely, meaning they don't have to follow predetermined lengths or 90-degree angles. Objects can also be positioned much more freely around your space.
That doesn't mean you have to eyeball your entire house. Snapping and grid tools are there when you want the extra structure. The grid can be toggled on and off, so you can use it when precision is helpful and ditch it when it's getting in your way. Press G to quickly toggle the grid. You can also temporarily disable snapping while placing something, giving you another way to get an object exactly where you want it.
Basically: the grid is a tool, not a rule.
SPLIT LEVELS & PLATFORMS
Your floors don't have to stay at one height either. Split levels and platforms can be created at different heights within the same floor, giving you more freedom to create sunken rooms, raised areas and less traditional layouts. Stairs can adjust to connect areas when the height difference is too large for your Para to step between naturally.
Curve Walls
Your walls don't have to be straight. Build Mode supports curved walls alongside traditional straight ones, which opens up a lot more possibilities for the actual shape of your home.
There is one Early Access limitation worth knowing: doors and windows can't currently be placed directly onto curved walls. Support for that is planned during Early Access, so this is one of those features that will continue changing as Paralives develops.
Shortcuts worth knowing
You absolutely don't have to memorize every Build Mode shortcut, but there are a few that can save you some clicks once you start building regularly.
Don't worry about learning these all at once. TAB, search, grid and undo are probably the ones worth getting into your muscle memory first.
TAB — Toggle between Live Mode and Build Mode
B — Build Wall
Ctrl/Cmd + F — Search the Build Mode catalog
G — Toggle Grid
K — Sledgehammer
I — Pipette
X — Rotate an item 90°
, / . — Rotate an item 45°
Delete — Sell/delete selected object
Page Up / Page Down — Move between floors
Ctrl + Z / Ctrl + Y — Undo / Redo
Design Basics
One of Paralives biggest strengths can also become a double-edged sword. Customization is great. Customizing the size, color, material, placement and individual details of every object in a room can also turn picking out a couch into a full-time job. If you find yourself staring at the color wheel instead of actually building, give yourself some boundaries.
PICK A COLOR PALETTE FIRST
Before you start changing every swatch, pick three or four colors you want to use throughout the room. You can pull colors from a reference image or create a palette yourself. You aren't permanently married to those colors. The goal is just to give yourself somewhere to start.
TRY THE 60-30-10 RULE
If you have colors you love but don't know how much of each to use, the 60-30-10 rule is an easy place to start.
Think roughly:
60% Dominant color: Walls, flooring or the largest pieces in the room.
30% — Secondary color: Furniture, curtains, rugs or other noticeable pieces.
10% — Accent color: Pillows, art, smaller decor and little pops throughout the room.
The point is to keep every color from competing for your attention at the same time.
START WITH THE BIG STUFF
Don't spend ten minutes customizing a tissue box when you haven't picked the couch yet. Once those anchor pieces work together, choosing the smaller objects becomes much easier because you're no longer making every decision from scratch.
Start with the things that have the biggest visual impact:
Flooring
Walls
Counters and cabinets
Sofa or bed
Large tables
Rugs

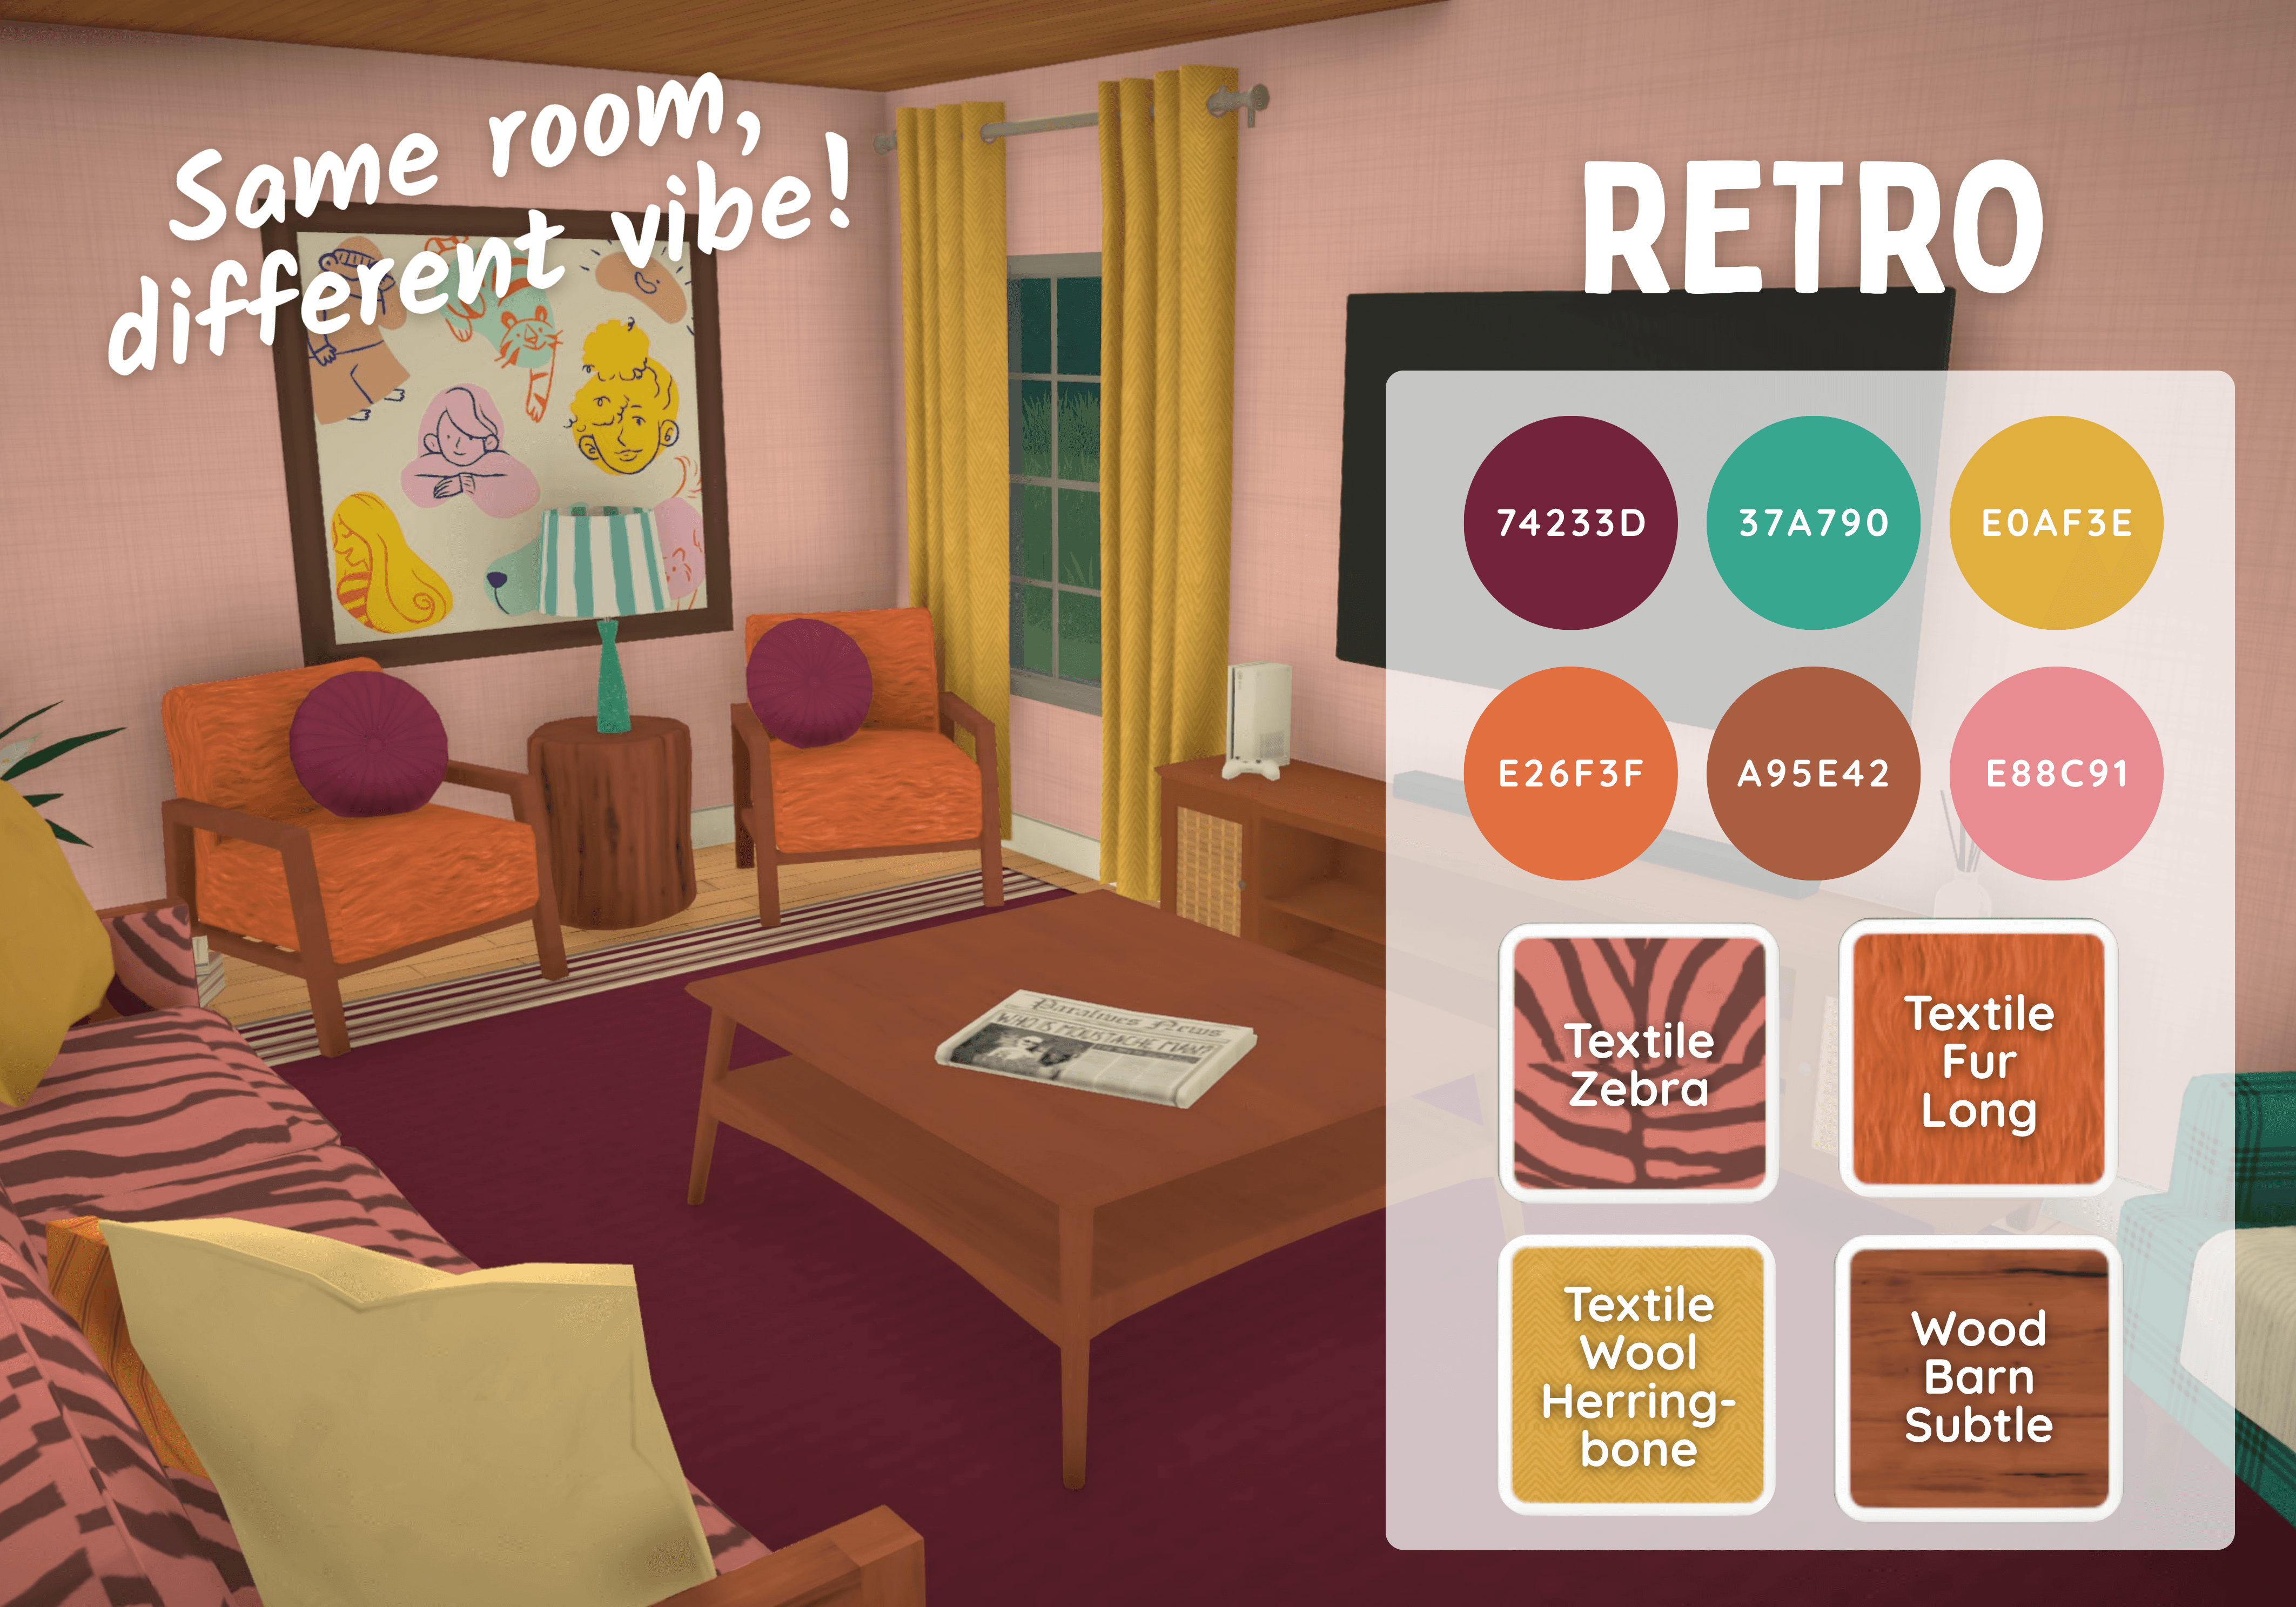


Would you believe me if I said these rooms are the exact same furniture just different styles?
THINK TEXTURE, NOT JUST COLOR
Two objects can technically be the same color and still feel completely different.
Wood, linen, stone, metal and other materials add another layer to your design. Before obsessing over the exact shade of brown, think about whether you want the room to feel warm, natural, sleek, cozy or something else entirely.
Sometimes choosing the material first makes choosing the color much easier.
my thoughts
Build Mode might have some of my favorite features in Paralives! People much more skilled than me have created AMAZING things. (a community spotlight guide is on my list) The amount of customization is kind of ridiculous in the best way. Being able to resize furniture, change materials, choose basically any color and place things without being locked to a grid makes it really easy to make a space feel like yours.
That being said, all those choices can get overwhelming fast. I’m a much more casual builder, so I’ve found my happy place starting with a great shell and spending my time decorating and customizing the inside.
Aspects I'm Loving
• ability to resize objects in a functional way • grid-less placement flexible • little customization details hidden everywhere
Needs Some TLC
• endless options can get overwhelming • some tools & icons are easy to overlook • object rendering could improve